How to insert data in MySQL using Node.js and Express.js
With continued competition in 2022 making startups worldwide, Node.js is being used everywhere. In this article, we will see how to build a RESTful API to insert Cars data in a MySQL database using Node.js and Express.js. So, let's get started.
Why tutorial on insert using MySQL, Node.js and Express.js?
With simple things, NoSQL databases like MongoDB are fine, however it becomes a nightmare when trying to connect a lot of relational data. The population is the main issue. Hence, while working with lots of relational data, MySQL is a great choice as compared to NoSQL databases.
Prerequisites
You should have Node.js installed on your computer. If not, then you can install Node.js from here. We will be using Node.js version 14 for this tutorial.
You should have a MySQL client installed on your computer, or you can use any online free MySQL database like remotemysql, freemysqlhosting, planetScale. I am using planetScale for this tutorial.
You should have one code editor installed on your computer. I will be using WebStorm, but any IDE is fine.
Without any further delay, let us see the steps to insert data in a MySQL database using Node.js and Express.js.
Step 1 - Install Express.js, MySQL using NPM command
Run the following commands in your terminal
mkdir myapp
cd myapp
npm init
npm install express mysql2 --save
Step 2 - Create and run Node Express.js app
Create app.js file and import express package and start the server in your local machine as shown below:
//import packages
const express = require('express');

//import services
const config = require('./config');

let app = express();
app.use(express.json());
// listen port 3000
app.listen(config.PORT, function () {
   console.log(`Node app is running on port ${config.PORT}`);
});

module.exports = app;
Run ‘node app.js’ command on terminal, and you should see:
node app.js
Step 3 - Create cars database and inside cars database create a car table in planetScale platform
PlanetScale is one of the most scalable MySQL platforms. You can get a free tier called Hobby where it provides 5gb storage, 1 billion rows read, and 10 billion write per month, 1 production database and 1 development branch. It is a very powerful and secure platform and also easy to integrate and deploy.
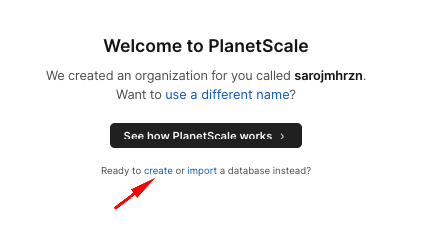
So you can go to planetScale website, signup and create a new database. For this tutorial, we will be creating a ‘cars’ database. After signing up you will see a page like
Click on create link and type ‘cars’ in the Name field and select a region where you want to deploy your database application. I have selected the region as below in the screenshot and click on the create database button.

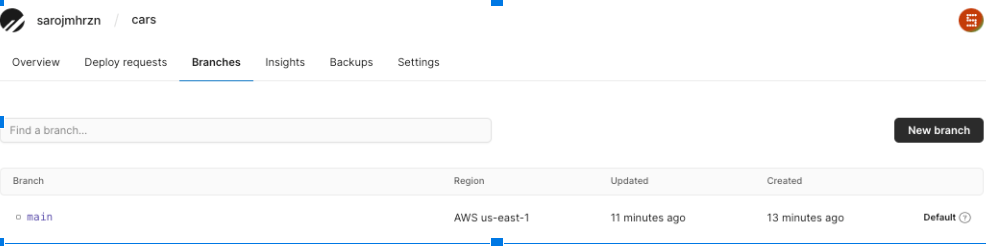
Now you will see your dashboard page with the main branch. At the right-hand side you will see a connect button where you can view your database credentials and a new branch button where you can create desired branches and deploy them. In this tutorial, we will not be creating a new branch, but will be creating a ‘car’ table in the main branch.
So, click on branches, and you will see a screen like below.
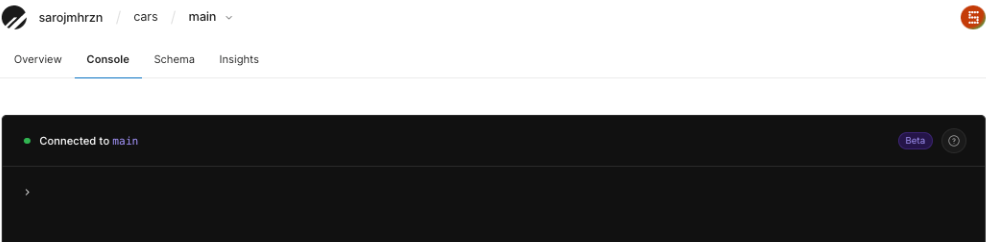
Now click on the main branch and select console option and you will see a command CLI like this.
Below are some of the few handy commands which we can run on the terminal. See more planetScale shell commands here.
use <database_name>; // selects the database to use
show tables; // lists all the tables
Select * from <table_name>; // lists all the data from table
clear; // to clear the console
Now to create a table, copy the SQL query below and paste in the console and hit enter. It will create a table called ‘car’. To view the tables, use the ‘show tables;’ command.
CREATE TABLE `car` (
	`id` int(11) NOT NULL AUTO_INCREMENT,
	`name` varchar(100) NOT NULL,
	`modelNumber` int NOT NULL,
	`price` float NOT NULL,
	`createdAt` timestamp NOT NULL DEFAULT current_timestamp(),
PRIMARY KEY (`id`)
);
Step 4 - Configure and connect MySQL database
Create a config.js file to add your database credentials, but in a real world application, we should not add passwords or sensitive information in this file.
const env = process.env;

// do not put password or any sensitive info here, done only for demo
const config = {
   PORT: env.PORT || 3000,
   db: {
       DB_USERNAME: env.USERNAME || 'sr6y7uc3u5c3tojios79',
       DB_PASSWORD: env.PASSWORD,
       DB_HOST: env.HOST || 'us-east.connect.psdb.cloud',
       NAME: env.NAME || 'cars'
  },
   listPerPage: env.LIST_PER_PAGE || 10,
};

module.exports = config;
After that, create db.js inside services folder file and add the following code into it to connect your app to the database. We have added the multipleStatements flag in order to prevent the sql injection. You can read more on sql injection here. We will use the mysql2 library as it provides the facility to use promise based request and response to our application.
const config = require('../config');
const mysql = require('mysql2');

const connection = mysql.createConnection({
   uri: `mysql://${config.db.DB_USERNAME}:${config.db.DB_PASSWORD}@${config.db.DB_HOST}/${config.db.NAME}?ssl={"rejectUnauthorized":false}`,
   multipleStatements: false
})

console.log('Connected to PlanetScale!');

module.exports = connection;
Step 5 - Insert data into MySQL table from Express.js API endpoint
As we have already created a table and database in planetScale, we will now create an API endpoint to insert into the car table using express.js First let’s create a car.js file inside services folder and add a code to insert into SQL database as shown below.
const db = require('../services/db');
const config = require("../config");

async function insert (name, modelNumber, price) {
   let message = 'Error in inserting car';
   const sql = `INSERT INTO car (name, modelNumber, price) VALUES ("${name}", "${modelNumber}", "${price}")`;
   const result = await db.promise().query(sql);
   if(result[0].affectedRows) {
       message = 'Car inserted successfully!'
 }
   return message;
}
I have also created a getAll() method inside car.js with two helper functions getOffset() and emptyOrRows() to enable paging and formatting the response respectively.
function getOffset(currentPage = 1, listPerPage) {
   return (currentPage - 1) * [listPerPage];
}

function emptyOrRows(rows) {
   if (!rows) {
       return [];
  }
   return rows;
}

module.exports = {
   getAll,
   insert
}
As we have created the methods to list and insert cars data in our car.js service, the final step now is to create an API endpoint using Express.js to list and create data in our database.
First, let’s create an API endpoint for the empty path which we want to see when our node server is started.
// Get homepage
app.get('/', function(req, res, next) {
   res.json({message: 'Welcome to the page!'});
});
With this path, we can see “Welcome to the page” text in our browser when we go to http://localhost:3000/

Similarly, we will create another 2 APIs, ‘/car’ and ‘cars’ to insert and list the cars data in our browser.
Let’s create an /car endpoint to insert in our database, which can be done as shown below.
// Save car data
app.post('/car', async function(req, res, next) {
   const name = req.body.name;
   const modelNumber = req.body.modelNumber;
   const price = req.body.price;

 const result = await carService.insert(name, modelNumber, price);
   res.json({message: result});
});
To test the endpoint, we will need to run the “curl” command in our terminal to insert in our database.
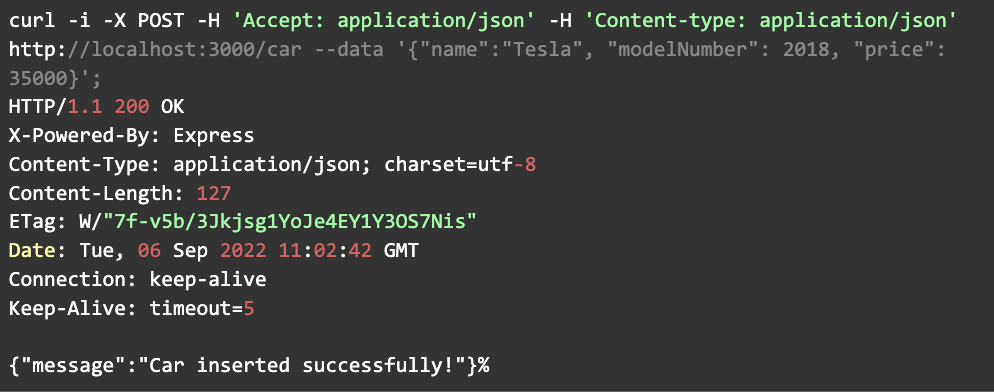
curl -i -X POST -H 'Accept: application/json' -H 'Content-type: application/json' http://localhost:3000/car --data '{"name":"Tesla", "modelNumber": 2018, "price": 35000}';
With successful curl operation, you will see responses like below.
Lastly, in the same way, let's create a ‘/cars’ endpoint to list in our database.
// Get all cars
app.get('/cars', async function(req, res, next) {
   const rows = await carService.getAll(req.query.page);
   res.json({data: rows.data[0]});
});
To test the endpoint, we can go to the browser and enter http://localhost:3000/cars URL, and we can see a car which we have inserted with the above ‘curl’ command.

Conclusion
This is the basic demonstration on how to insert into a MySQL database using Node.js and Express.js. In the same way, we can add other database methods like UPDATE, DELETE etc. We can also add data validation before sending data to SQL and add better error handling methods for the real world application.
GitHub Repository: here